Setup a new client
This guide provides an overview of how to setup android and IOS for new app’s client.
Android Setup
Add New Flavor in build.gradle Open android/app/build.gradle.
In the android block, locate the productFlavors section and add your new flavor inside the productFlavors block:
    productFlavors {
        ...
        new-client-flavor{
            dimension "app"
            applicationId "com.rekindlelearning.new-client-flavor"
            resValue "string", "app_name", "new-client-name"
        }
    }
iOS Setup
iOS flavors are going to be more nuanced to setup. Also, iOS configuration is mostly done using the XCode UI and not by editing config files in a text editor
Create custom scheme
First we need to setup something called custom schemes. We’ll need to fire up Xcode and openios/Runner.xcworkspace
And then, here’s how to setup a custom scheme called dev
Add build configuration for new scheme
At this stage, if we try to run the app it won’t work. The error will tell us that Flutter expects a build configuration by the name of Debug-dev or similar.
Let’s create these build configuration:
Note that for this new scheme,you will need to create build configuration for Debug, Profile and Production.
Connect “dev” build configurations to “dev” scheme
If you try to run the app now it will work. But right now we have not customized anything in the build scheme / build configuration, so the app is running with the same configuration as it was earlier.
The Dev ones are still connected to the original scheme. Lets fix that as well…
Update Bundle identifier
Now we have our new scheme connected to its own build configurations. We can now customize things for this scheme. Let’s first change the app bundle identifier. Remember to use the same bundle identifier for Android and iOS (bundle identifier in iOS is parallel to the applicationId in Android). So let’s change our prod bundle identifier to com.kanily.flavortest.prod
Update App name
Now all you have to do is to change the App name for this new client
Additional Steps (IOS)
After you have the app’s flavor created for new client, make sure you have the
Profilecreated and if don’t than create one. You can check the status here developer.apple.com/account/resources/profiles/listWe need to create
CertificateforApple Push Services. You can create it here developer.apple.com/account/resources/certificates/listOnce you have the
ProfileandCertificatecreated, is time to update the CodemagicProvisining Profilesotherwise Codemagic build will not work for this new app.
To do that, follow the steps below.
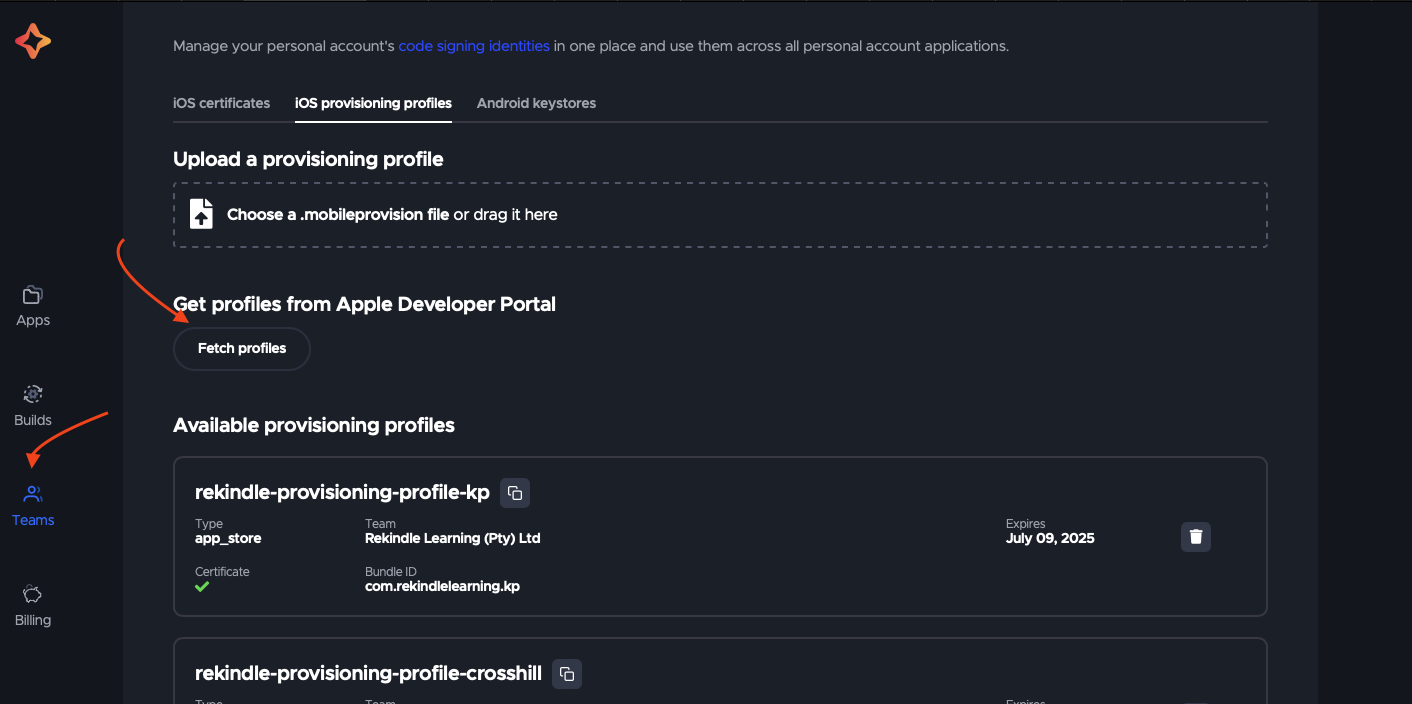
Login to Codemagic account
Navigate to
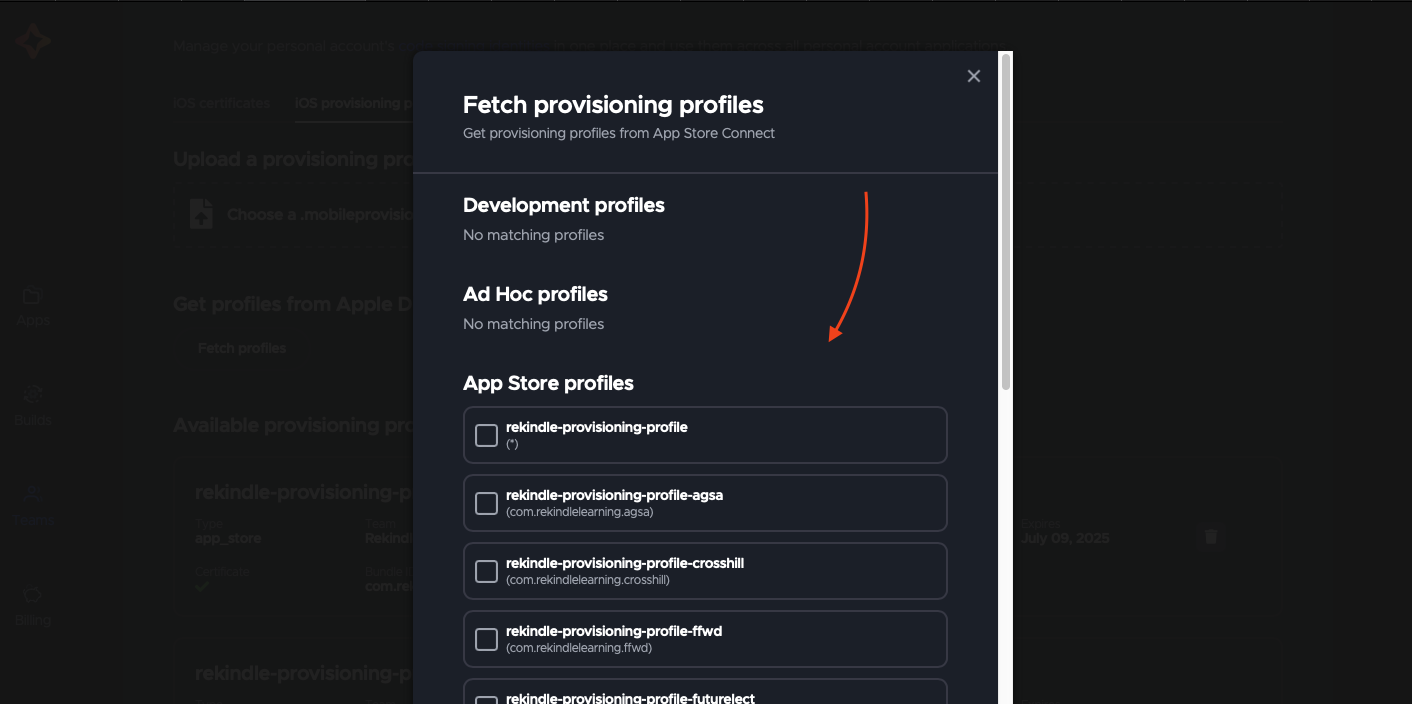
Teamssection and scroll down until you findCode signing identitiessection. Expand it, selectiOS provisioning profilesand then fetch the new provising profiles.
Now we’re done we IOS Setup!